Каталог Kemmler цанговые зажимы - страница 56
Навигация
 Каталог Kemmler сверлильные патроны для станков с ЧПУ
 Каталог Kemmler гидроразжимные патроны
 Общий каталог Kemmler 2020
 Каталог Kemmler зажимные болты
 Каталог Kemmler резьбонарезные патроны
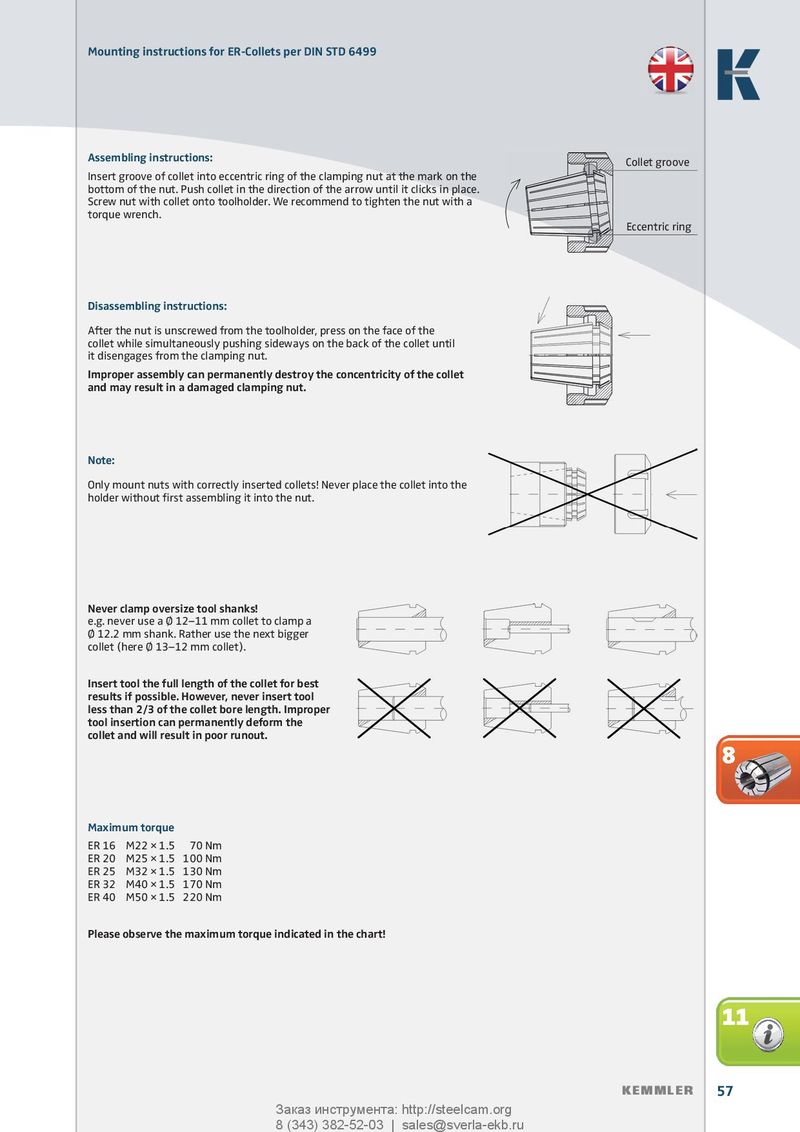
Mounting instructions for ER-Collets per DIN STD 6499 Assembling instructions: Collet groove Insert groove of collet into eccentric ring of the clamping nut at the mark on the bottom of the nut. Push collet in the direction of the arrow until it clicks in place. Screw nut with collet onto toolholder. We recommend to tighten the nut with a torque wrench. Eccentric ring Disassembling instructions: After the nut is unscrewed from the toolholder, press on the face of the collet while simultaneously pushing sideways on the back of the collet until it disengages from the clamping nut. Improper assembly can permanently destroy the concentricity of the collet and may result in a damaged clamping nut. Note: Only mount nuts with correctly inserted collets! Never place the collet into the holder without fi rst assembling it into the nut. Never clamp oversize tool shanks! e.g. never use a Ø 12–11 mm collet to clamp a Ø 12.2 mm shank. Rather use the next bigger collet (here Ø 13–12 mm collet). Insert tool the full length of the collet for best results if possible. However, never insert tool less than 2/3 of the collet bore length. Improper tool insertion can permanently deform the collet and will result in poor runout. 8 Maximum torque ER 16 M22Œ×Œ1.5 š70 Nm ER 20 M25Œ×Œ1.5 100 Nm ER 25 M32Œ×Œ1.5 130 Nm ER 32 M40Œ×Œ1.5 170 Nm ER 40 M50Œ×Œ1.5 220 Nm Please observe the maximum torque indicated in the chart! 11 KEMMLER 57 Заказ инструмента: http://steelcam.org 8 (343) 382-52-03 | sales@sverla-ekb.ru