Каталог Stellram фрез со сменными пластинами - страница 287
Навигация
 Каталог Stellram твердосплавные цельные фрезы
 Каталог Stellram токарный инструмент
 Каталог Stellram системы со сменными пластинами для фрезерования с высокими подачами
 Каталог Stellram высокопроизводительные фрезерные системы
 Каталог Stellram материалы и сплавы
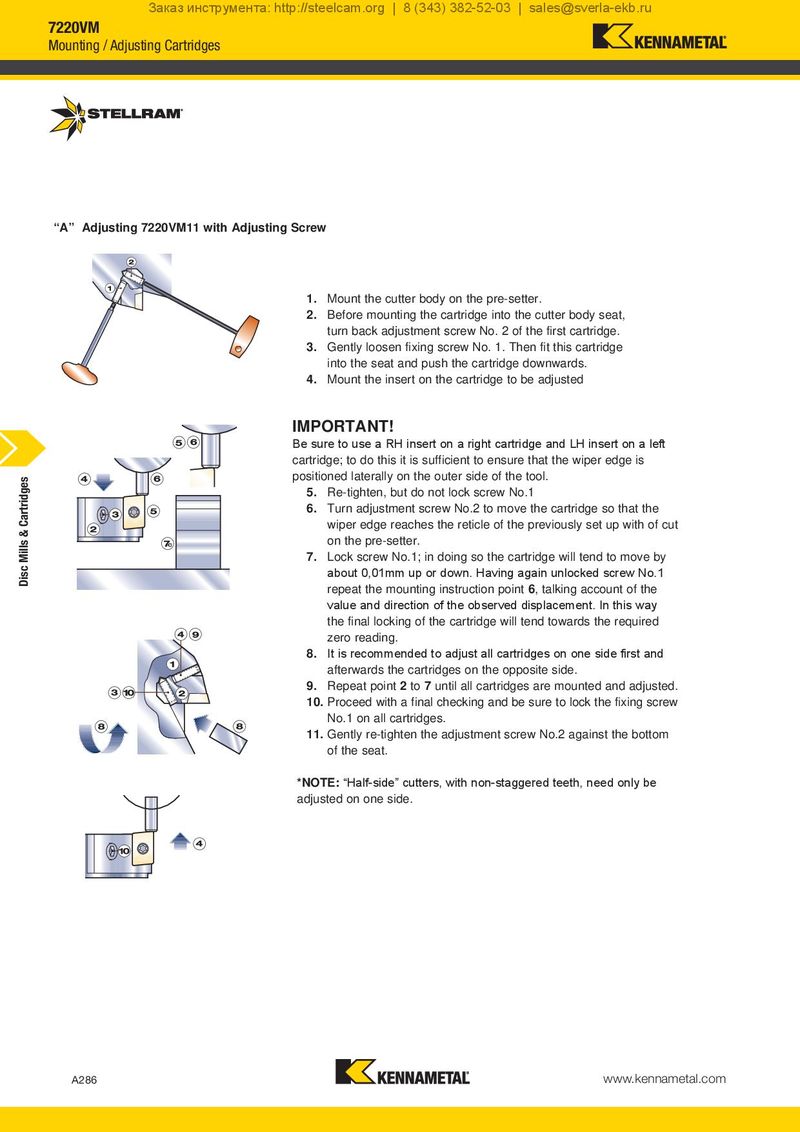
Заказ инструмента: http://steelcam.org | 8 (343) 382-52-03 | sales@sverla-ekb.ru 7220VM Mounting / Adjusting Cartridges “A” Adjusting 7220VM11 with Adjusting Screw 1. Mount the cutter body on the pre-setter. 2. Before mounting the cartridge into the cutter body seat, turn back adjustment screw No. 2 of the first cartridge. 3. Gently loosen fixing screw No. 1. Then fit this cartridge into the seat and push the cartridge downwards. 4. Mount the insert on the cartridge to be adjusted IMPORTANT! Be sure to use a RH insert on a right cartridge and LH insert on a left cartridge; to do this it is sufficient to ensure that the wiper edge is Disc Mills & Cartridges positioned laterally on the outer side of the tool. 5. Re-tighten, but do not lock screw No.1 6. Turn adjustment screw No.2 to move the cartridge so that the wiper edge reaches the reticle of the previously set up with of cut on the pre-setter. 7. Lock screw No.1; in doing so the cartridge will tend to move by about 0,01mm up or down. Having again unlocked screw No.1 repeat the mounting instruction point 6, talking account of the value and direction of the observed displacement. In this way the final locking of the cartridge will tend towards the required zero reading. 8. It is recommended to adjust all cartridges on one side first and afterwards the cartridges on the opposite side. 9. Repeat point 2 to 7 until all cartridges are mounted and adjusted. 10. Proceed with a final checking and be sure to lock the fixing screw No.1 on all cartridges. 11. Gently re-tighten the adjustment screw No.2 against the bottom of the seat. *NOTE: “Half-side” cutters, with non-staggered teeth, need only be adjusted on one side. A286 www.kennametal.com