Каталог Iscar вращающийся инструмент 2017 - страница 843
Навигация
 Каталог Iscar токарные пластины ISO 2022
 Каталог Iscar инструмент для фрезерования
 Каталог Iscar решения для глубокого сверления
 Каталог Iscar полирующие фрезы
 Каталог Iscar новые продукты 2018
 Каталог Iscar концевые фрезы со сменными пластинами 2022
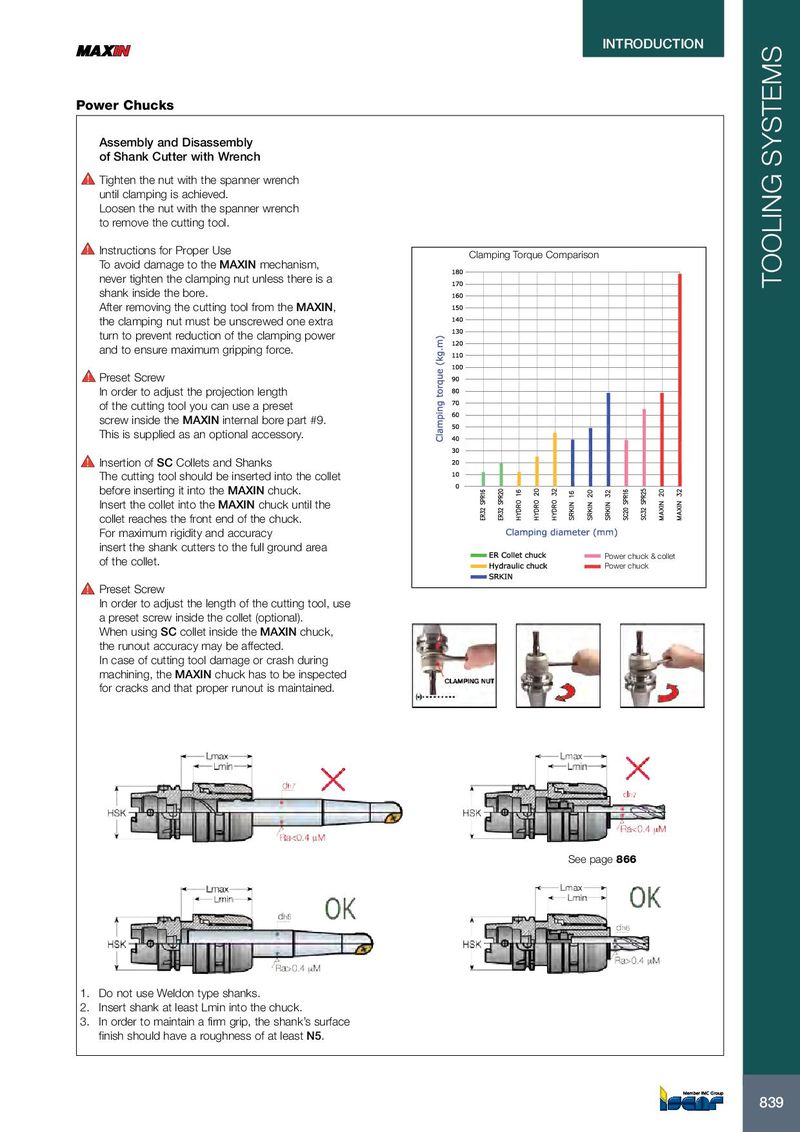
INTRODUCTION INTRODUCTION Power Chucks Assembly and Disassembly of Shank Cutter with Wrench Tighten the nut with the spanner wrench until clamping is achieved. Loosen the nut with the spanner wrench to remove the cutting tool. Instructions for Proper Use Clamping Torque Comparison To avoid damage to the MAXIN mechanism, never tighten the clamping nut unless there is a TOOLING SYSTEMS shank inside the bore. After removing the cutting tool from the MAXIN, the clamping nut must be unscrewed one extra turn to prevent reduction of the clamping power and to ensure maximum gripping force. Preset Screw In order to adjust the projection length of the cutting tool you can use a preset screw inside the MAXIN internal bore part #9. This is supplied as an optional accessory. Insertion of SC Collets and Shanks The cutting tool should be inserted into the collet before inserting it into the MAXIN chuck. Insert the collet into the MAXIN chuck until the collet reaches the front end of the chuck. For maximum rigidity and accuracy insert the shank cutters to the full ground area Power chuck & collet of the collet. Power chuck Preset Screw In order to adjust the length of the cutting tool, use a preset screw inside the collet (optional). When using SC collet inside the MAXIN chuck, the runout accuracy may be affected. In case of cutting tool damage or crash during machining, the MAXIN chuck has to be inspected for cracks and that proper runout is maintained. See page 866 1. Do not use Weldon type shanks. 2. Insert shank at least Lmin into the chuck. 3. In order to maintain a firm grip, the shank’s surface finish should have a roughness of at least N5. 839 839