Каталог Widia инструментальная оснастка - страница 1101
Навигация
 Каталог Widia достижения 2021
 Брошюра Widia решения для аэрокосмической промышленности
 Брошюра Widia техническое руководство
 Каталог Widia токарный инструмент 2020
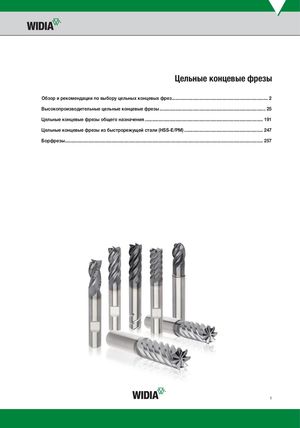 Каталог Widia цельные концевые фрезы
 Каталог Widia техническое руководство по разверткам
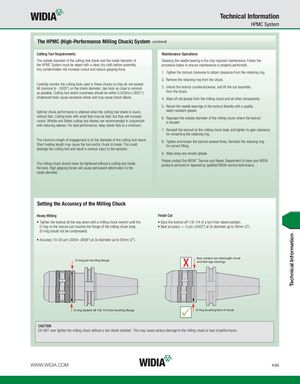
Technical Information HPMC System The HPMC (High-Performance Milling Chuck) System (continued) Cutting Tool Requirements Maintenance Operations The outside diameter of the cutting tool shank and the inside diameter of Greasing the needle bearing is the only required maintenance. Follow the the HPMC System must be wiped with a clean dry cloth before assembly. procedure below to ensure maintenance is properly performed: Any contamination will increase runout and reduce gripping force. 1. Tighten the locknut clockwise to obtain clearance from the retaining ring. 2. Remove the retaining ring from the chuck. Carefully monitor the cutting tools used in these chucks so they do not exceed h6 (nominal to -.0005") on the shank diameter. Use tools as close to nominal 3. Unlock the locknut counterclockwise, and lift the nut assembly as possible. Cutting tool shank roundness should be within 0,003mm (.0001"). from the chuck. Undersized tools cause excessive stress and may cause chuck failure. 4. Wipe off old grease from the milling chuck and all other components. 5. Recoat the needle bearings in the locknut liberally with a quality, Optimal chuck performance is attained when the cutting tool shank is round, water-resistant grease. without flats. Cutting tools with small flats may be held, but they will increase 6. Regrease the outside diameter of the milling chuck where the locknut runout. Whistle and flatted cutting tool shanks are recommended in conjunction is housed. with reducing sleeves. For best performance, keep shank flats to a minimum. 7. Reinstall the locknut on the milling chuck body and tighten to gain clearance for reinserting the retaining ring. The minimum length of engagement is 2x the diameter of the cutting tool shank. 8. Tighten and loosen the locknut several times. Recheck the retaining ring Short holding length may cause the tool and/or chuck to break. This could for correct fitting. dislodge the cutting tool and result in serious injury to the operator. 9. Wipe away any excess grease. Please contact the WIDIA™ Service and Repair Department to have your WIDIA The milling chuck should never be tightened without a cutting tool inside products serviced or repaired by qualified WIDIA service technicians. the bore. High gripping forces will cause permanent deformation to the inside diameter. Setting the Accuracy of the Milling Chuck Heavy Milling Finish Cut • Tighten the locknut all the way down with a milling chuck wrench until the • Back the locknut off 1/8–1/4 of a turn from above position. O-ring on the locknut just touches the flange of the milling chuck body • Best accuracy — 5 μm (.0002") at 3x diameter up to 50mm (2"). (O-ring should not be compressed). • Accuracy 10–20 μm (.0004–.0008") at 3x diameter up to 50mm (2"). O-ring just touching flange X face contact can distraught chuckand damage bearings O-ring backed off 1/8–1/4 from touching flange O-ring touching face of chuck CAUTION DO NOT over tighten the milling chuck without a tool shank inserted. This may cause serious damage to the milling chuck or loss of performance. WWW.WIDIA.COM K65 Technical Information