Основной каталог Kyocera 2016-2017 - страница 275
Навигация
 Каталог Kyocera фрезы MFH для высокоскоростной обработки
 Каталог Kyocera фрезы MEC высокопроизводительные концевые и торцевые фрезы
 Каталог микроинструмента Kyocera 2015-2016
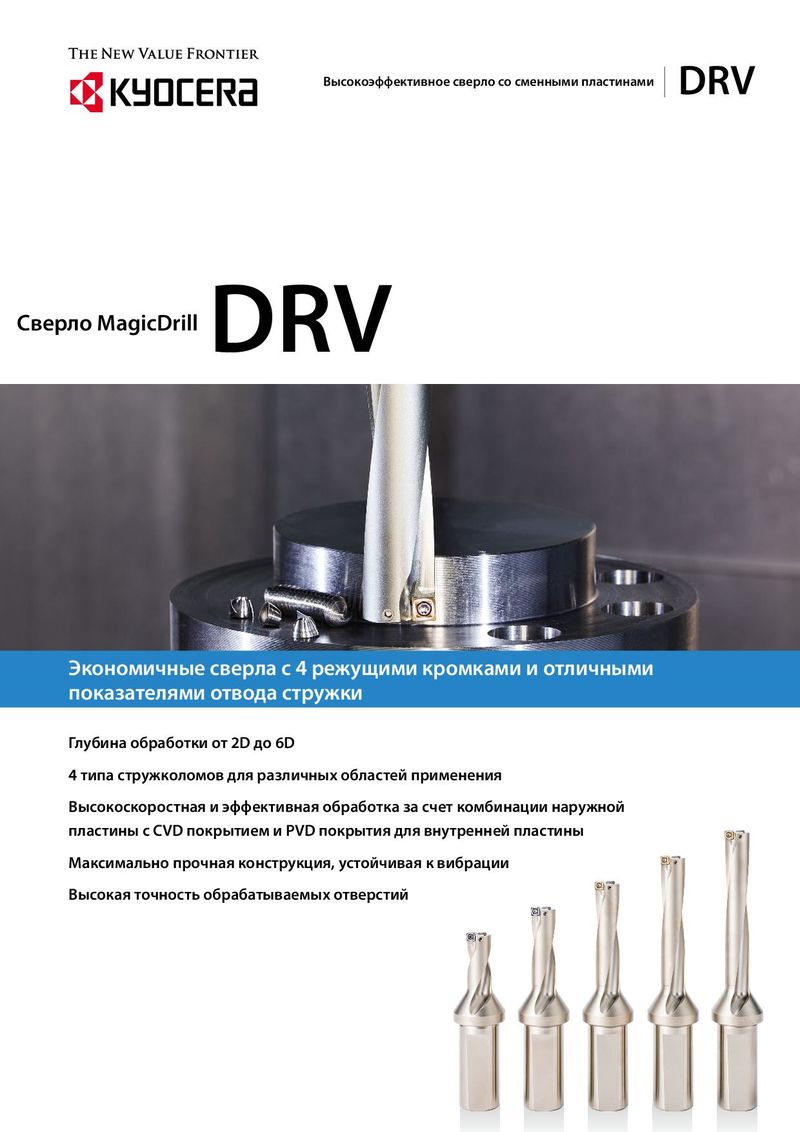 Каталог Kyocera высокоэффективные сверла со сменными пластинами DRV
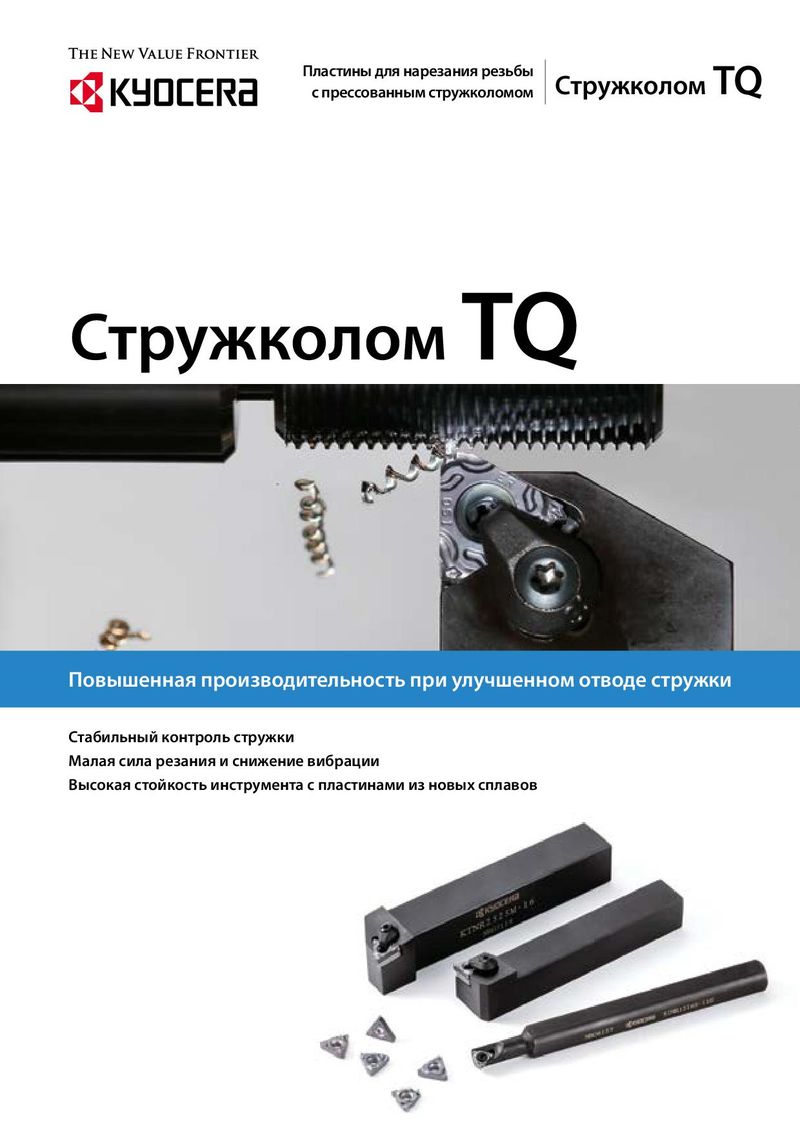 Каталог Kyocera пластины TQ для нарезания резьбы c прессованным стружколомом
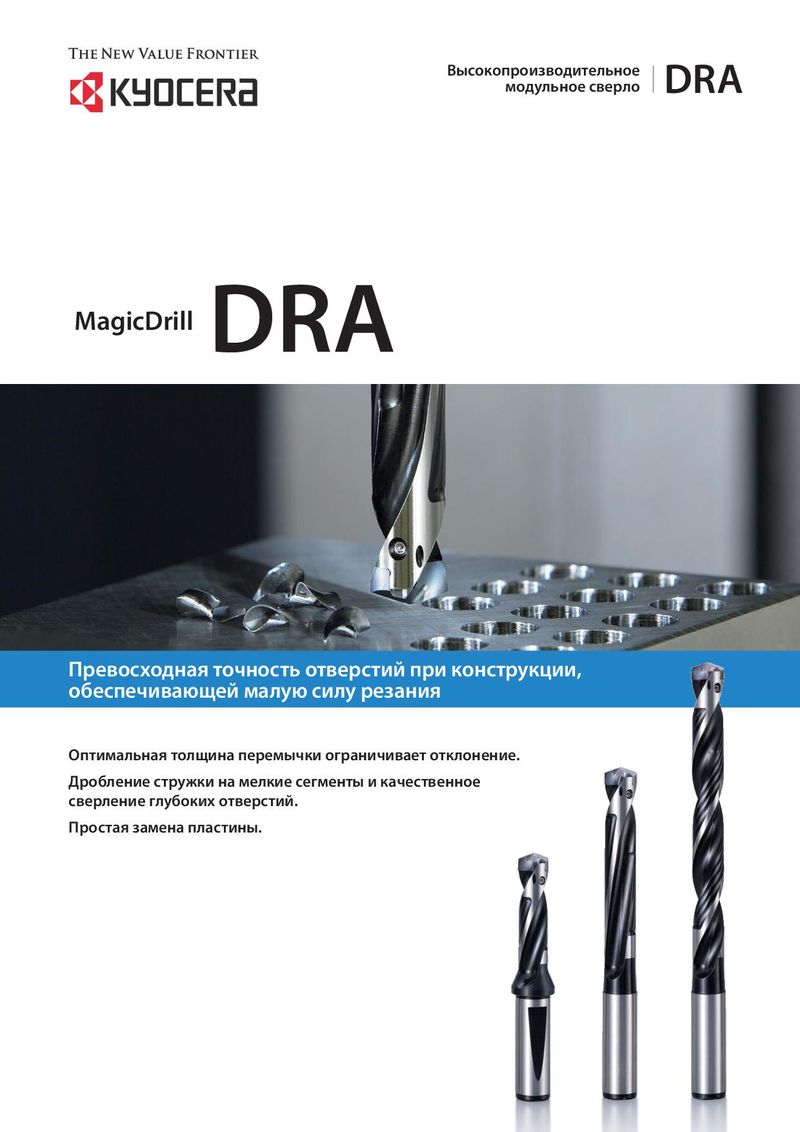 Каталог Kyocera высокопроизводительные модульные сверла DRA
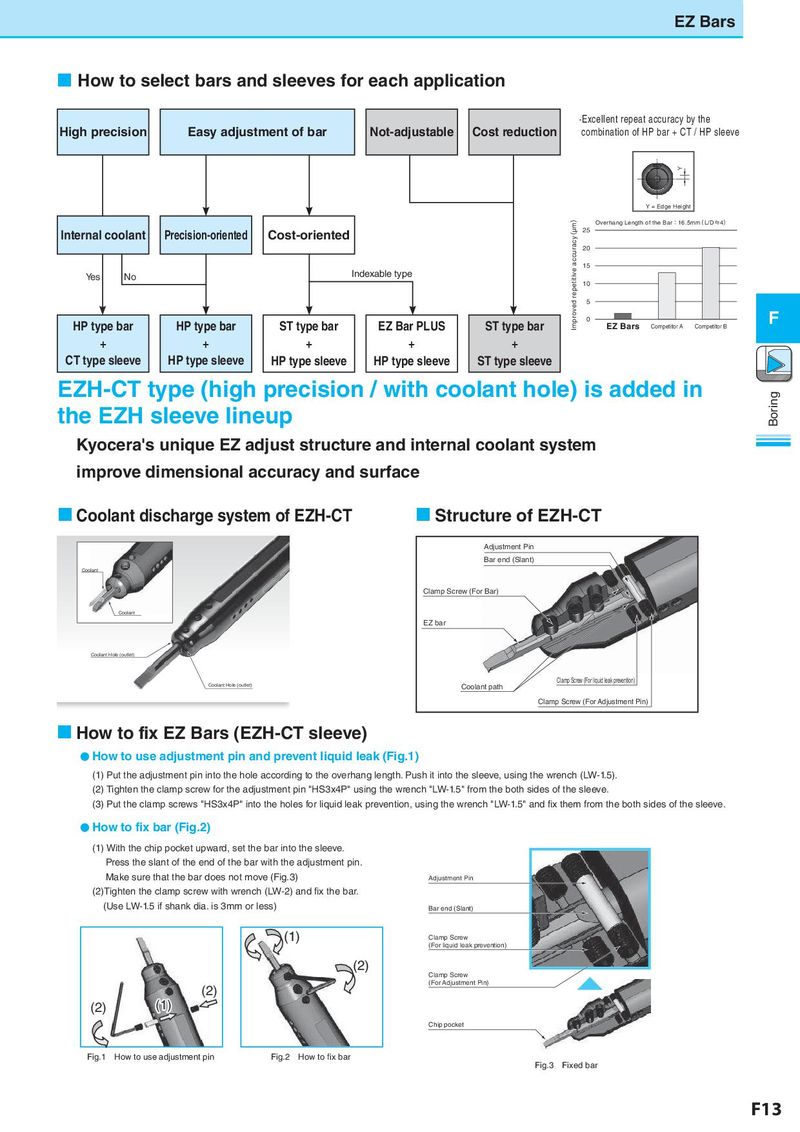
EZ Bars How to select bars and sleeves for each application ·Excellent repeat accuracy by the High precision Easy adjustment of bar Not-adjustable Cost reduction combination of HP bar + CT / HP sleeve Y Y = Edge Height Improved repetitive accuracy(μm) Overhang Length of the Bar:16.5mm(L/D≒4) InternYeasl cooNlaont Precision-oriented Cost-oriented 25 20 15 Yes No Indexable type 10 5 HP type bar HP type bar ST type bar EZ Bar PLUS ST type bar 0 F EZ Bars Competitor A Competitor B + + + + + CT type sleeve HP type sleeve HP type sleeve HP type sleeve ST type sleeve EZH-CT type (high precision / with coolant hole) is added in Boring the EZH sleeve lineup Kyocera's unique EZ adjust structure and internal coolant system improve dimensional accuracy and surface Coolant discharge system of EZH-CT Structure of EZH-CT Adjustment Pin Bar end (Slant) Coolant Clamp Screw (For Bar) Coolant EZ bar Coolant Hole (outlet) Coolant Hole (outlet) Coolant path Clamp Screw (For liquid leak prevention) Clamp Screw (For Adjustment Pin) How to fix EZ Bars (EZH-CT sleeve) ● How to use adjustment pin and prevent liquid leak (Fig.1) (1) Put the adjustment pin into the hole according to the overhang length. Push it into the sleeve, using the wrench (LW-1.5). (2) Tighten the clamp screw for the adjustment pin "HS3x4P" using the wrench "LW-1.5" from the both sides of the sleeve. (3) Put the clamp screws "HS3x4P" into the holes for liquid leak prevention, using the wrench "LW-1.5" and fix them from the both sides of the sleeve. ● How to fix bar (Fig.2) (1) With the chip pocket upward, set the bar into the sleeve. Press the slant of the end of the bar with the adjustment pin. Make sure that the bar does not move (Fig.3) Adjustment Pin (2)Tighten the clamp screw with wrench (LW-2) and fix the bar. (Use LW-1.5 if shank dia. is 3mm or less) Bar end (Slant) (1) Clamp Screw (For liquid leak prevention) (2) Clamp Screw (2) (For Adjustment Pin) (2) (1) Chip pocket Fig.1 How to use adjustment pin Fig.2 How to fix bar Fig.3 Fixed bar F13